budget kitchen renovations home christmas decoration .
budget kitchen renovation the home depot the .
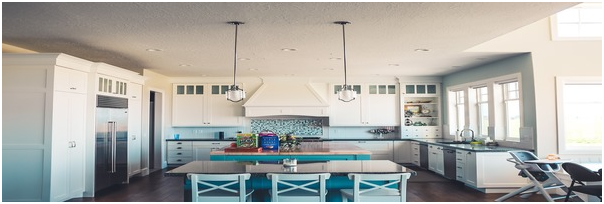
everywhere beautiful kitchen remodel big results on a .
kitchen small kitchen remodel ideas on a budget small .
kitchen remodel budget worksheet kitchen remodel worksheet .
budget kitchen renovations home design and decor reviews .
kitchen decor cheap kitchen remodel .
budget kitchen renovations home design and decor reviews .
kitchen kitchen remodeling budget unique on kitchen with .
a budget diy kitchen renovation diy decorator .
kitchen remodeling on a budget mybktouch com .
kitchen remodeling kitchen design kansas cityremodeling .
best 25 budget kitchen remodel ideas on pinterest cheap .
kitchen renovation source list budget friendly kitchen .
7 easy ways to budget kitchen and bathroom remodeling .
kitchen remodeling on a budget mybktouch com .
best 20 kitchen walls ideas on pinterest .
kitchen renovation costs planning a budget old house .
remodeling kitchen on a budget .
budget kitchen remodel total remodel for under 10k clean .
the true cost of kitchen remodeling the wiese company .
simple kitchen renovation tips on a budget modern kitchens .
kitchen cool budget kitchen remodel ideas budget kitchen .
kitchen remodeling on a budget mybktouch com .
budget kitchen remodeling kitchens under 2 000 .
budget kitchen remodelbest kitchen decoration best .
four seasons style the new kitchen remodel on a budget .
kitchen decor kitchen remodel on a budget .
best 25 kitchen renovations ideas on pinterest home .
kitchen remodels before and after photos modern kitchens .
everywhere beautiful kitchen remodel big results on a .
kitchen renovation costs 12703 .
kitchen small kitchen remodel with wooden chair small .
39 s kitchen renovation what it really cost a.
kitchen renovation details budget tips to a diy kitchen .
kitchen kitchen remodel ideas on a budget cabinet design .
kitchen remodel designs low budget kitchen renovation ideas .
where your money goes in a kitchen remodel homeadvisor .
home renovation budget spreadsheet template spreadsheet .
kitchen kitchen remodel ideas on a budget kitchens with .
fresh low budget galley kitchen remodel 15524 .
kitchen renovation costs 12703 .
budget friendly modern white kitchen renovation home tour .
4 kitchen renovation mistakes that will ruin your budget .
farm kitchen budget remodel before after photos .
kitchen renovation on budget interiorholic com .
complete kitchen remodel kitchen renovation budget .
kitchen kitchen remodel ideas on a budget kitchen photos .
6 best kitchen cabinet remodeling ideas .
home renovation ideas on a budget free home renovation .
kitchen dreams low budget kitchen remodel .
budget friendly modern white kitchen renovation home tour .
10 ideas for remodeling your kitchen on a budget making .
kitchen small kitchen remodel ideas on a budget small .
beautiful kitchen remodel on a budget before and after .
Source
http://pertamini.co/kitchen-renovation-budget/