All posts by Shannon

Things That You Need For a Bathroom Renovation

People renovate their houses for different reasons, one of the most common reasons being to increase the total value of the house. The most recommended renovation for your house is the bathroom renovation. Your bathroom renovation is not only a good way to hike your house’s worth, but also an effective way of increasing the space and hence the efficiency of the bathroom. You will need a couple of things for a successful bathroom renovation, as explained in this article. These necessities not only include the choice of bathtub designs or tile patterns, but also unexpected expenses and other unpleasant requirements that you have to think about.

1.    Budget

The budget should be your first priority. The first thing you need to recognize is that the more work you need on your bathroom renovation, the more you will spend. The larger the bathroom you intend to build, the more the budget increases. The best way to go about this is to set a limit on the amount of money you intend to spend on your bathroom renovation. The discussion with the contractor will then determine the amount of work and number of items you will be able to purchase for the resonation.

2.    Time requirements

You need a lot of time for the renovation. This time includes the time you need for planning the renovation as well as the amount of time you need for the entire remodeling process. You need to ensure that you plan all the required time to the completion of the renovation. Ensure that each process discussed with the contractor gets enough time.

3.    Unexpected needs.

It is possible for your project to have extra requirements that are foreseen by neither you nor the contractor. Systems such as plumbing systems or electricity systems might have faults that you did not know about. A complete bathroom renovation should include a complete replacement or repair of such systems to ensure that the functionality of the bathroom is at its peak. You should also ensure that you have extra time and money to deal with such issues when preparing the work schedule and the budget.

4.    Contractor

Although it is possible to perform the complete renovation without the help of a contractor, it is important that you consider hiring a professional one, especially when you have limited skills in the project. A contractor will help you decide the appropriate and precise measurements of the renovation and advice you on various factors such as the requirement for any replacement or repair of certain parts of the bathroom such as the plumbing, electricity and the best position placement for certain elements of the bathroom including cabinets.

5.    Measurements

Measuring the current bathroom is important. Even more important, is the measurement of the new bathroom. You need to how you will gain the additional space for the bathroom. You should understand that these measurements might affect additional aspects of the bathroom including the plumbing and electricity systems. It is also important to realize that the items you need to purchase for installation in the bathroom will also depend on the measurements. Your precision when making measurements and calculations will determine the success rate you have in the renovation.

6.    Style and preferences

Why do you want to renovate? What do you intend to replace? What improvements do you have planned? All these surround your preferences and the type of changes you intend to make. You should research on the available designs for certain elements of the bathroom including the tiles, wall paint, sinks, toilets and any storage, for instance cabinets. You should research on the best designs, alignment, and placement of different components and make efforts to choose a combination that complements each other.

7.    Walls and floors

Your walls and floors should have a certain waterproof element considering that it is a bathroom. You should choose different styles and designs for the color and the patterns of tiles on the bathroom floor. Ensure that they match you preferences and bring out the best of your bathroom.

8.    Lighting

The amount of light for your bathroom, whether night or day, is important. Without adequate lighting in the bathroom, you increase the chances of a fatal accident happening to the users of the bathroom. Adequate light per square area should be enough. Ensure that you make use of natural light during the day and that you have great artificial light for the dark times of the day.

Your bathroom’s efficiency depends on a number of aspects that include the arrangement and design of the different components of the bathroom, the lighting, as well as the space. The renovation project would greatly improve the functionality of the bathroom. However, when you do it wrong, you will face a loss as the bathroom will still have problems, which you should have eradicated during the planning phase.

Source

http://t2conline.com/things-that-you-need-for-a-bathroom-renovation/

Tool Review: Milwaukee M12 Cordless Multi-Tool. « Home Improvement Stack Exchange Blog

For a long time I’ve avoided purchasing an Oscillating Multi-tool.  I thought they were gimmicky, flimsy, and not as useful as advertised.  I used a cheap no-name brand multi-tool in the past, and was not impressed by its performance.  Turns out the “Multi-tool” market has grown rapidly, and the products have gotten a lot better.  I decided it was finally time for me to give this tool a second look, and I am fairly impressed by what I found.

Most every major power tool manufacture now has their own versions, and for the most part the name on the box is a good indication of how well the tool is built.  Prices range from about $50.00 – $300.00; I opted for a middle of the road offering, and picked up the Milwaukee M12 Cordless Multi-Tool.

What’s in the box:

(The bag looks much pinker in this picture, it’s actually red).

The package I purchased contained:

  • 2426 M12 Cordless LITHIUM-ION Multi-Tool
  • Adapter
  • Wood Cutting Blade
  • Sanding Pad
  • (5) Assorted Sanding Sheets
  • (2) M12 RED LITHIUM Batteries
  • 30-Minute Charger
  • Contractor Bag

Technical Details:

Voltage 12V
Variable speed 12 Settings
OPM (oscillations per minute) 5,000 – 20,000
Charge Time 30 Min
Length 10-7/8 in.
Weight 2.1 lbs.

At $99.00 (Home Depot) it was near the lower-middle end of the price range, but that doesn’t seem to be an indication of quality.  The tool feels good in your hand; it has a little beef to it and doesn’t feel flimsy at all.  The rubber coating provides a good surface for gripping the tool, so there is no chance the tool will slip from your hand while you work.  It has a healthy whir when switched on, and doesn’t bog down at all when loading up.  It gets to work cutting or sanding, without any hesitation at all.  The included adapter allows it to work with accessories from most other companies, so there shouldn’t be any problems finding bits to extend the tools usefulness.  The biggest selling point for me, however, was the lack of a cord.

It has a speed adjustment on the side, which was slightly stiff at first but loosened up after being used a bit.  The speed adjustment wheel is not placed well, which makes it slightly awkward to adjust while in use.  The On/Off switch is also poorly placed, and is difficult to interact with while holding the tool in a working position.  A locking trigger switch near the bottom of the tool would be much more convenient and easier to use.  Switching from bit to bit is slightly cumbersome, but this seems to be a poor design aspect of this type of tool.  Another design aspect overlooked was a hook or loop, so the tool could be hung from a tool belt.  It has a protrusion just above where the battery connects (underside of the tool), to house a screw.  It’s too bad they didn’t design some type of metal ring that could connect here allowing the tool to be clipped to a tool belt.  The design of the tool could defiantly use some improvements, but it seems to fall in line with most tools of this type.

I found the battery slightly difficult to load/unload, but once it’s in place there is no fear of it accidentally being dislodged.  The battery indicator on the side of the tool is useful, letting you see how much use you have left.  It also provides various indications that the battery is low, the tool is too hot, or that the tool has shutdown due to overload, binding, or stalling.  The tool seems to throttle down when not under load; which I’m guessing is a battery saving mechanism, though I couldn’t find any documentation that described this behavior.  It came with 2 batteries and a 30-minute charger (that actually charges that fast), so down time waiting for a charge is limited.  The batteries don’t last long, however (15-25 minutes), so expect to make frequent trips to the recharger.

And by now you’re thinking, “That’s all well and good, but HOW WELL DOES IT WORK!”.

I used the tool first for repairing damage in a plaster and lath wall.  If you’ve ever had to cut lath, you know what a pain it can be.  This handy tool cut the plaster and lath no problem, and did it without damaging any of the surrounding plaster.  Cutting the hole for a new gang box in a drywall patch was a breeze, it cut the hole faster and cleaner than a typical jab saw.  With that job complete, it was time to search the garage for other things to cut and sand.

Once in the garage my eyes immediately set on a scrap piece of pressure treated 2×4, so I clamped it into the vise and got to work.  It took a little bit, but I was able to cut through the 2×4 rather easily.  I was really impressed at the quality of the cut, it was fairly smooth and would require little sanding if this was a finish cut.  This tool is definitely at home around wood, and would be handy for lots of woodworking projects.

The next item up required a trip to the local hardware store, since the package did not include a blade for cutting metal. Once I acquired a blade, Bosch OSC312F 3-1/2 in. x 7/8 in. BIM Flush cut Wood and Metal Blade ($25.00! @ Home Depot),  it was time to cut some steel.

I tried cutting a variety of nails, screws, and bolts; but found that anything thicker than a finish nail took quite a bit of effort to cut.  I decided to try cutting out a hole in an aluminum soffit cover, for a receptacle I plan on installing in the future.  It took a bit of effort, but once I made the original plunge cut the rest of the cut was fairly easy.  Maybe there are better blades available for cutting metal, but with this blade, cutting metal was a chore.

The final challenge was sanding, and as expected it did a good job at it.  As advertised, it fit into tight spots and corners fairly well.  It may not be the best tool for large sanding jobs, but it is definitely useful for those small hard to reach jobs.

All in all, the Milwaukee Multi-Tool performed rather well in my testing.  I couldn’t see it replacing any specialty tools: circular/jig/reciprocating saw, angle grinder, orbital/palm/belt sander.  It is quite a handy tool, and would be a good addition to any tool box.  It excelled when working with wood and drywall/plaster, but next time I have to cut metal I won’t be reaching for this tool.  Despite a few minor design imperfections, it does have sturdy construction, is versatile, and performs fairly well.  I’d rate the Milwaukee M12 Cordless Multi-Tool 3.5 Captain Constructions out of 5.

Filed under Tool ReviewTools

Tagged: ,

Source

https://diy.blogoverflow.com/2011/11/tool-review-milwaukee-m12-cordless-multi-tool/

Column: Bay Area Home Improvement with Kyle McClay – Quartz —claycord CLAYCORD.com

Bay Area Home Improvement is a new column on Claycord.com.

This week on Bay Area Home Improvement, we’re talking Quartz with Kyle McClay, owner of American Kitchen Company in Concord.

Visit  to see more.

You can always review this and other videos on the Home Improvement Tab shown above.

Bay Area Home improvement is a new weekly column on Claycord providing you tips to help guide you along with your home projects. Kyle McClay, owner of American Kitchen Company in Concord, you may have seen on KRON4, will provide you with weekly tips on various subjects, complete with a short video. We will archive this and each edition on the Home Improvement tab above for anytime you wish to reference them.

You are welcome to leave your comments or ask questions for advice below.

Quartz is made from the hardest minerals on Earth and is arguably one of the most durable options for the kitchen.

Here’s why.

It is not mined like granite, it is grounded up in a factory and mixed with a polymer resin. It is around 94% grounded quartz.

The resin used to bind it makes it scratch and stain resistant. The resin also makes it non-porous. Therefore, mold, mildew, and any micro-bacteria cannot penetrate the material. This makes it very easy to clean with just a little bit of mild soap and water and a soft cloth.

In addition to being really strong, easy to clean, and micro-bacteria resistant, the main reason to want quartz, it’s beautiful.

Quartz is very designer friendly because it can do uninterrupted runs. When you put two pieces of quartz together, we simply match up the veins and it will look seamless.

Please leave your comments below, we’d love to hear from you.

Visit  to see more.

Source

http://claycord.com/2018/03/08/column-bay-area-home-improvement-with-kyle-mcclay-quartz/

5 Home Improvement Projects To Tackle In The Winter

Are you a fan of the cold, snowy weather? It’s nice to take short walks outside, but it’s even nicer to head back into a warm home. Most people are inside a lot during the winter, making it the perfect time to take on a few home improvement projects. For this week’s post, I have some projects to help brighten up your home this time of year.

  1. Refresh the Look of Your Bathroom. A bathroom serves a practical purpose in a home, but that doesn’t mean it can’t be beautiful as well. Look at the bathroom your family uses the most. You can refresh its look by making little changes such as replacing the old faucets with a new design, or you could replace the floor with tile in a fresh color or pattern. Sometimes, refreshing the look of a powder room can be done by putting up a piece of artwork or hanging a mirror with an ornate design above the sink. I think something as simple as recaulking a bathtub or shower makes a big difference in the appearance of a bathroom. You may be inspired to order a new set of towels and washcloths for springtime!
  2. Declutter Your Rooms. What better time is there to declutter than when it’s too cold to venture outside? Keep a big garbage can handy so you can dispose of anything that is worn out and taking up valuable space in your closets or cabinets. Also, have a bag ready for items to donate to your local Goodwill or similar organization. Charity organizations are always looking for toys, clothing, games, kitchen items, and furniture in good condition. I like the idea of giving older items new life; don’t you? By the time spring rolls around, you’ll have a head start on your spring cleaning!
  3. Refurbish Interior Doors. Refurbishing your interior doors can be accomplished in many ways. You can do something as simple as installing a new doorknob in a different style or color. You can paint a door a different color or refresh its current color, if you like it. Putting up decorative window film featuring a stained glass or opaque glass design is an idea for doors with windows in them. Window film is great for French or patio doors. Decorative window film is visually appealing while providing you with more privacy.

I hope you tackle one or more of these projects to make your home look its best this winter. Thanks for reading. – Alan

Source

https://www.alansfactoryoutlet.com/blog/5-home-improvement-projects-to-tackle-in-the-winter

First Time DIY: Carpet vs Hardwood « Home Improvement Stack Exchange Blog

When my wife & I decided to buy our first house I had never thought about whether I wanted hardwood floors or not. My wife on the other hand, LOVED them. After we had picked out our house, we were doing a walk through to determine what things needed to be fixed by the sellers  (a sampling): maxwell floors 2

  • Repair the moldy bathroom
  • Find and repair the gas leak
  • Clean the carpet

We walked into the now guest bedroom and I saw that there was no molding in the closet and that the carpet was loose. Instead of just marking it down as something for them to fix, I was curious and pulled back the carpet. To our surprise, we found original hardwood floors! My wife flipped.

After pulling back the closet’s carpet completely, we saw that it looked almost as if the floors had been refinished and then someone laid carpet on top of it. What a shame.

Once we found the flooring, the repair list looked more like this:

  • Repair the moldy bathroom
  • Find and repair the gas leak
  • Clean the carpet Whatever you do, do NOT clean the carpet!

But, what the sellers heard was:

  • Don’t worry yourself about the mold in the bathroom, just knock a couple hundred off the price
  • Gas leak? *sniff* What gas le–…. *passes out*
  • Ignore our requests and please clean the carpet and leave it wet Pay ZERO attention to this!

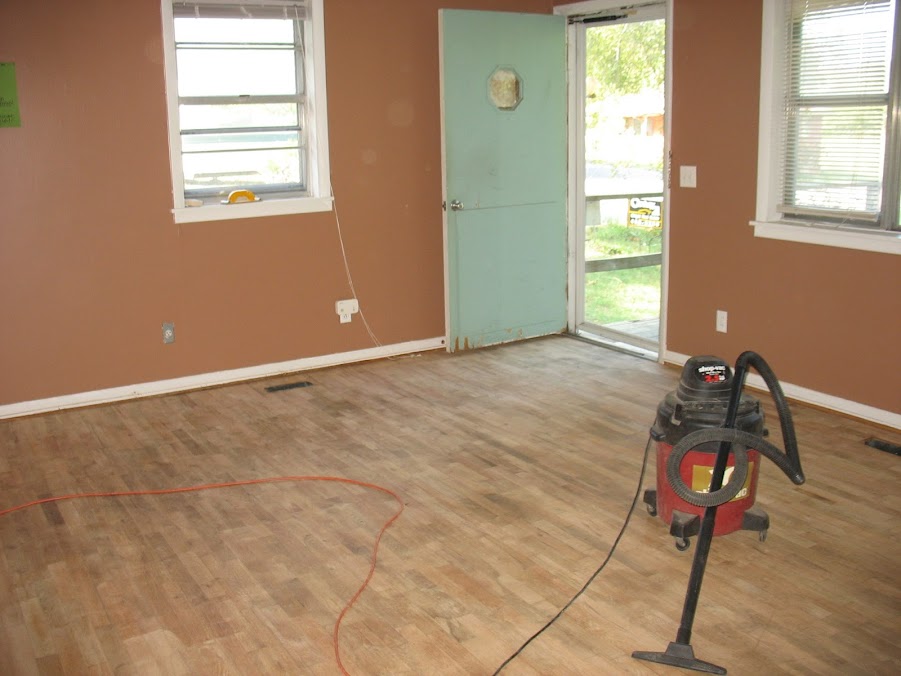
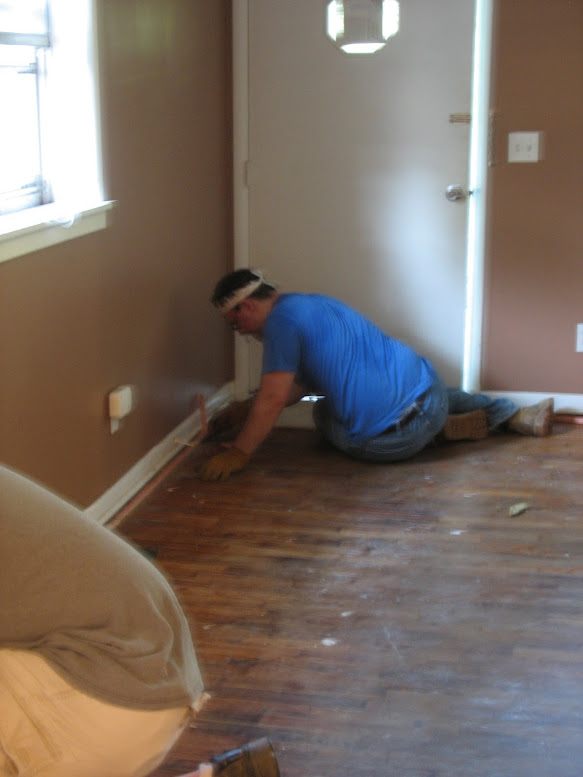
I about lost it. Not only did the two things we wanted fixed not get fixed, but now, instead of rolling up and disposing of dry carpet, I had to work with soggy, smelly carpet. Luckily, my friend, Josh, came over and helped me out.

First we took off the quarter round, then we ripped up the carpet and pad. After we finally got it all out of the house, we went around the room and pulled up the tack strip from the edges of the room Because of delays to our closing date, we now only had a few days to completely refinish the floor before we had to move out of our old apartment, my in-laws came down to help us sand the floors.

I rented an Expandable Drum Floor Sander and a 7″ Floor Edger Sander. I worked the floor sander while my father-in-law worked the edger.

A few things I learned from this experience:

  • Clean the floors first & remove as much of the old carpet/cushion as possible. We were lucky enough to only tack strips along the edges of the carpet. But, some of the cushion tore off and stuck to the floor where the previous tenants spilled something. Any sticky residue will gum up the sanding belts and they’ll be useless.

(Quick Tip: If you find that your belts are beginning to get gummed up, sometimes you can take a soft wire brush to them, scrapping off a bit of the residue and continue sanding.)

  • Crawl on your hands and knees to find nail heads, screws, staples, etc. Again, we were lucky enough to have been told this before hand or else I would probably have totally fouled up my first sanding belt. If you don’t find and pull out (staples) or hammer back down (nails) these pieces of metal, you run the risk of ruining your sanding belt or worse: break the drum itself.
  • Go with the grain. It will look terrible if you do not.
  • KEEP IT MOVING! I don’t have a picture, but if you don’t keep that drum sander moving, you WILL end up with a dip in your floor from where the sander just kept digging in.  Same goes for the edger: if you let it set in one place for too long, you’ll begin to smell burning wood and you’ll come away with a black spot on your floor. I learned both of these lessons the hard way.
  • If you start to see a lot of dust, clean out your bag
Maxwell floors 6

Sorry the picture’s a bit fuzzy, but if you look hard you can see the little bits of carpet pad stuck to the floor. That’s where they stapled the pad down.

Just like with any sanding project, you have to start with rough grit and work your way up to a finer grit.  It took us the better part of a day to get the living room and two bedrooms finished. Afterwards you’re left with a very nice ready to stain floor.

Maxwell Floors 7

Be sure to vacuum well before you apply any stains or sealers.

We spent the next two days in a combination of staining/sealing and moving. We had one extra room in the house were we stored everything we owned. We stacked boxes to the ceiling in that little room. We even slept there, my wife on the couch and me on the floor.

In the end it was all worth it though! I don’t always like the hardwood, but BOY! does it feel good to show it off and say that we did it!

As of this writing, there are now scratches on the floor – but that’s pretty typical wear & tear. It’s about time to do some touch up work. Maybe I’ll write something about that, too!


Finished a project lately that has made you proud? Let us know in the comments!

Filed under Projects

Tagged: , ,

Source

https://diy.blogoverflow.com/2013/03/first-time-diy-carpet-vs-hardwood/

Kitchen Renovation – Moving to Open Concept « Home Improvement Stack Exchange Blog

This is part two of a series.

For part one, read Kitchen Renovation – Introduction and Footings.

The previous installment dealt with the building a new footing to support the interior end of the beam. When I last left you, I had posted a picture of wet concrete in a hole. As luck would have it, that wet concrete soon became dry, hard concrete. I watered it a couple of times to help it cure, and waited the prescribed 5 days (warm weather) curing time before loading it. Installing the posts was relatively simple. Cut 2x4s to length, hammer them into the bracket, and bolt them together. Well, it should have been simple. The problem was that 5 2x4s makes a post 7 1/2 inches. I had a stud that I really didn’t want to demolish at about 16 inches on either side. My drill, with a bit long enough to penetrate the post, was just too big to fit in that stud bay. The idea occurred to me that I could use a shorter bit, and by drilling the holes with absolute perfection, have them meet somewhere in the middle. However, that involves more precision than I am capable of; so I nixed that idea right off the bat. I ended up using a short, 3/8 spade bit to start the hole, and when I had gone in a couple of inches, stuck the long bit in the hole, wiggled my drill onto the long bit, and using some severe bodily contortions, managed to tighten the chuck. Then I finished drilling.

Now that the holes were drilled, it should have been a simple matter of slipping the bolts in and tightening the nuts. Not quite. There was a new problem. An 8-inch carriage bolt doesn’t quite make it through 7 1/2 inches of post when the 2x4s aren’t exactly tight together. I grabbed a couple of bar clamps and tried to move everything, but it just didn’t work. Road Trip! Off to the the blue store! At the blue store, I bought a ten inch bolt. I stuck it in, and nutted it tight, and everything came together tightly — tight enough that the next hole now took the 8 inch. Working up, I pulled the post together, and when I was done, took the ten-incher out and replaced it with and 8. I’m sure I could have returned the long bolt, but I had used it, and decided not to.

I installed a bit of blocking at the top, used structural screws to the header, and 10d nails into the bracket at the bottom. Once everything was done, it felt really solid. I’m not a structural engineer, but sometimes you can just tell that something won’t fall down. This won’t. Unfortunately, I was rather neglectful in the camera department, so all I have is a picture of the top of the post.

Top of basement post.

Next Step: Prepare for the post at the other end.

This one should have been simpler. I had a lot more room to work, having cleared out a couple feet of plaster on either side. The plan called for a single 8″ bracket, drilled into and epoxied to the top of the foundation wall. I had a sneaking suspicion that the foundation wall might have been hollow block, which would have required me to fill a couple of courses with concrete before mounting the bracket. Luckily, I was wrong. It was a solid poured foundation and it was wide enough for full bearing. Simple! All I need to do is drill and slip in my bracket. What I didn’t consider, and neither did my engineer, was that all those joists had to end up somewhere. In particular, the 2×8 double joist that was supporting the existing wall would probably be resting on the foundation wall right where I wanted to put my post! There was a third joist a couple inches away, and the space between was filled another bit of 2×8. So I opened up my finest drafting tool (MSPaint) and put together a quick sketch to email to the engineer:

Revised plan for exterior wall post.

That email was sent off, and my wife and I went out to a friends for 1 pound striploins, many kilos of wine and several of Fidel’s finest exports. The engineer got back the next day and approved my revision. Road Trip! This time, to the orange store, which rents tools. I rented a concrete drill and bought a tube of concrete epoxy. It took about 3 minutes out of a 4 hour rental to drill the hole. I cleaned the hole out with the shop vac, squeezed in the tube of epoxy, and stuck the base in. I quit there, figuring we’d put the post up on beam day. Besides, I had a whole lot more work to do.

Demolition:

Once again we enter the realm of lower skilled labour. My contractor is booked solid over the summer, and can only give me a day here and there for jobs that I really need him for. Swinging a hammer at old plaster walls isn’t a valuable use of his skills. So I did it myself. First, I put 6 mil poly and duct tape over every door in the house. I had learned from the small amount of demolition that I had already done for the front post, that dust gets everywhere. Turns out I needn’t have bothered. Dust got everywhere anyways. I did have the foresight to put big shipping bags over all the furniture that was too big to move out, and laid the 6-mil over the wood floor. Then I spent two days swinging a sledge, prying and reciprocating away the plaster walls. Not fun work, but also not work I want to pay top dollar for. A second person would have been useful to make trips to the dumpster, but I didn’t want my spouse becoming concerned over the mess I was creating. The only point of interest is that plaster is messy, and some genius thought it would be a brilliant idea to put wire mesh on ever corner, both inside and outside, nailed about every 2 inches. I suppose it was meant to last, and it did last for 50 years, but I wanted it to no longer last. I also ran into something the previous owner had done himself. At one point he had installed some off the shelf cabinetry, and added a couple more cabinets than the original builder had. This meant that the bulkheads didn’t quite match up. So he boxed them out with plywood. The only problem was that he was a frugal man. The type of penny-pinching gentleman that saves every screw he has ever removed in a jar. Well, he used those recycled treasures on this project. It took five different screwdrivers to pull them out: two sizes of Phillips, red and green Robertson and a slot. I saved those screws, and will use them to install something just before I sell the house. He actually did a good job of it. Everything was tight and square, and there was no room to squeeze in my reciprocating saw with a metal blade to cut them off.

At some point in there, my brother-in-law and his wife came over to help Anna pack up the cabinetry, and destroy any cabinetry that we could get away without. I also made some trips to the specialty lumber yard to order parts. I needed a couple of big nasty metal brackets to connect the beam to the posts. The load should be bearing down on the posts vertically, but we need something that can handle a bit of torque or the whole house collapses like this: / /. I also needed to order the beam, which was 4 plies of 16 inch by 1 3/4 inch LVL. The parts I needed, while standard in the catalogue, are actually made to order. This meant some delays, but the Simpson Strong Tie plant is only a 15 minute drive from my place, so I saved some time by picking them up rather than waiting for delivery. I also went to the bolt specialty store to pick up big 3/4 inch by 8 inch bolts at 8 bucks a piece.

Also somewhere in there, I spent a day and a half moving electrical circuits away from the wall to be demolished. Unfortunately, the orange store did not have wire stretchers available for rent, so it involved purchasing junction boxes to put in the basement drop ceiling or attic for splicing purposes. Only three orange/blue trips. Managed to snag a 20 m roll of 14/2 off of my next door neighbour who literally just happened to be carrying it out of the house to my bin (with my permission), as she was cleaning up her late husbands workbench. The fun work begins:

Wiht all the prep done, it’s now that most joyous of days! Beam Day! My contractor, Adriano and his buddy Franky showed up, with a truckload of tools, when they said they would, with a cup of Tim Horton’s each. On time and pre-coffeed. These are responsible contractors. They took 15 minutes to look at my plans, look at my parts, and took off to the orange store to buy big honking drill bits. Half an hour later, they were back, ready to work.

The first thing we did was install the post at the front, and mount one of the big ECC brackets. Then more of the same at the other end. IMPORTANT: Everything takes longer than you expect. Cutting, drilling and bolting 5 2x4s together should only take 10 minutes. Wrong. It’s more like 30. Then drill 2 8-inch by 3/4 inch holes for the bracket bolts. About 15 minutes each. Between Adriano’s drill, Franky’s drill and my drill, we managed to not heat them up too much. Adriano did one end, Franky the other, and I ran around and did what I was told without getting in the way. Once the post and brackets were up, it was time to install the beam.

We live in a back split, and are very fortunate (for this job) to have fantastic access to the the attic. Through the wall — not the ceiling. But, even with that, there was no way we were going to be able to manouevre a 23-foot long beam to that access door. Particularly since we only had 20 feet to the back of the house. Adriano went into the kids’ room, and took out a window. Something I never would have had the courage to do. (For fear of breaking the glass or slicing my hand off.) Franky and Adriano fed the beam segments up to the second floor window, while I grabbed and got it into the house to a balance point. Then I could hold it while the guys ran upstairs to feed it in the rest of the way. The first three segments went in easily, the fourth required a bit of “encouragement”. But we squeezed them into the brackets. We now had 4 plies in the brackets — and it was only 10:30. This job would be done by noon! Franky screwed a 2×6 across the joists parallel to the beam so we could use a pry-bar to straighten the beam, and temporarily screw it the the joists to keep it straight. (Important: do this before bolting to the brackets.)

All that was left was to drill 8 3/4 inch holes, 24 1/2 inch holes, bolt everything in, and nail up the joist hangers. That took another 4 hours. Plus a trip to the blue store for more nuts and nails. At 2:30, it was time to test our creation. Franky and Adriano went at the stud wall with sledges and pry-bars and got rid of the of the offending lumber while I ran back and forth to the dumpster. At 3:15, there was a mass rush with brooms, garbage cans and the shop vac, while we fought over the ownership of tools. Actually, sorting out tools was easy. I had designated 3 areas beforehand so that each person had their own storage. Other than a couple of drill and impact bits that we were exchanging freely, everyone respected the zones.

3:45, beer on the back patio, while I counted money out to the boys. They earned every penny. There was no way I could have done this job with a couple of unskilled buddies and a case of beer.

The Money Shot!

Post and Beam connection against exterior wall.

Post and Beam – Interior

Post and Beam Interior

Why we did this

Anna was thrilled when she came home. We had finally achieved the open concept that we wanted. Well worth the effort.

The question I know you all have is “Was he properly attired during all this work?” I’ll leave you with this photo, salt stains and all:

Next Up: Flooring, Kitchen and more demo.

Filed under Projects

Source

https://diy.blogoverflow.com/2014/07/kitchen-renovation-moving-to-open-concept/