Week 5 of the bathroom renovation is here and this week has been all sorts of crazy with the bathroom remodel and just life. I feel like I have worked on this bathroom so much this week and I don’t have as much to show for it. But really, there is a lot of effort that goes into all the finishing details. That is always what is to be expected when it is time for finish work!
Bathroom Renovation: Trim & Moldings
The window needed trimming, so I used some of the floor tiles for the bottom shelf as an accent.
We also added this marble molding to the edges. This tile says it is crown molding, but I wanted to add a decorative molding to the edges and this was the perfect fit.
Bathroom Renovation: Wainscoting
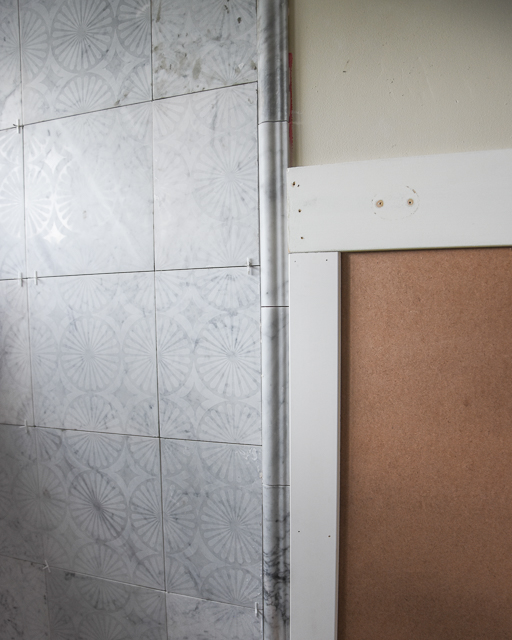
Our main project for this week was to get the wainscoting up. Unfortunately, this bathroom had lots of damage on the walls from the previous vanity and mirror. Rather than put up new sheet rock, we added 1/8″ thick hardboard over the top.
 First, I added the hardboard and then I added the base to the bottom over the top of the hardboard.
Next, I ran a 3/4″ x 5 1/2″ wide piece of MDF (you can get this at Home Depot) across the top of the hardboard. Once that was in place I used casing to run the length from the base to the top cap.
To install this I used my finish nailer, tape measure and saw.
You will want to use spackle for all of your holes, followed by a light sanding. Remember to add in caulking along the edges if there are any gaps. Painting is best after caulking has already dried.
Tune back in to see our final reveal of this bathroom coming soon!
Brooke
You might also like…
The post Bathroom Renovation: Week 5 appeared first on Start at Home Decor.
Source
https://startathomedecor.com/2018/05/bathroom-renovation-week-5/