Week 5 of the bathroom renovation is here and this week has been all sorts of crazy with the bathroom remodel and just life. I feel like I have worked on this bathroom so much this week and I don’t have as much to show for it. But really, there is a lot of effort that goes into all the finishing details. That is always what is to be expected when it is time for finish work!
Bathroom Renovation: Trim & Moldings
The window needed trimming, so I used some of the floor tiles for the bottom shelf as an accent.
We also added this marble molding to the edges. This tile says it is crown molding, but I wanted to add a decorative molding to the edges and this was the perfect fit.
Bathroom Renovation: Wainscoting
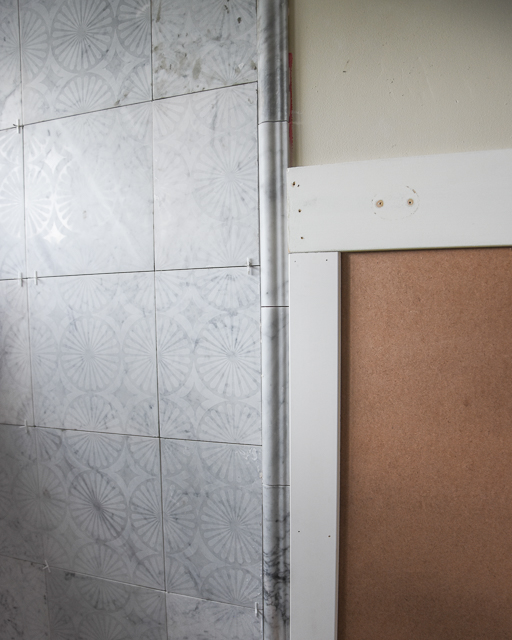
Our main project for this week was to get the wainscoting up. Unfortunately, this bathroom had lots of damage on the walls from the previous vanity and mirror. Rather than put up new sheet rock, we added 1/8″ thick hardboard over the top.
First, I added the hardboard and then I added the base to the bottom over the top of the hardboard.
Next, I ran a 3/4″ x 5 1/2″ wide piece of MDF (you can get this at Home Depot) across the top of the hardboard. Once that was in place I used casing to run the length from the base to the top cap.
To install this I used my finish nailer, tape measure and saw.
You will want to use spackle for all of your holes, followed by a light sanding. Remember to add in caulking along the edges if there are any gaps. Painting is best after caulking has already dried.
Tune back in to see our final reveal of this bathroom coming soon!
Brooke
You might also like…
The post Bathroom Renovation: Week 5 appeared first on Start at Home Decor.
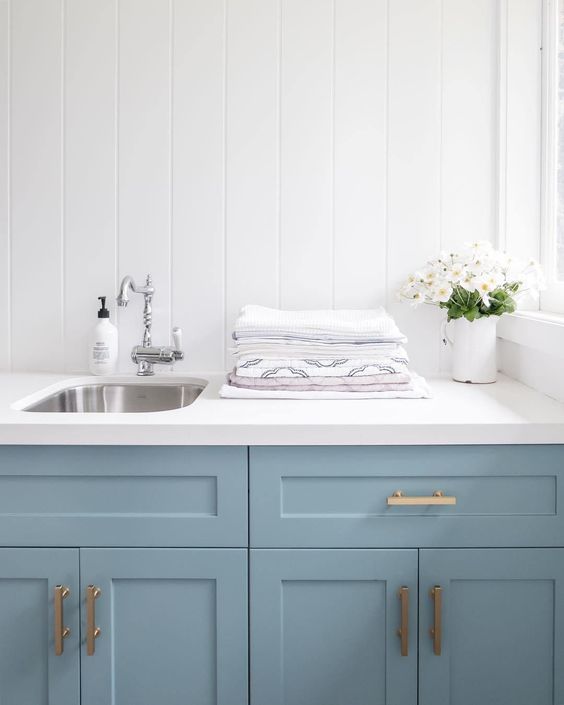
There’s nothing wrong with a bold color in the kitchen — if it’s executed well. Sadly that was not the case for Shannon’s sporadically navy blue kitchen. She made some small updates to the space when she first moved in, and after living with the kitchen for a few years, she decided it was time to give the space the true makeover it deserved.
From Shannon: When we first bought the house six years ago, the kitchen walls and cabinet panels were painted a dark navy color. The floor was very old linoleum. We immediately painted the walls white and re-did the flooring to match the original hardwood floors throughout the rest of the house. You can see those minor changes in the photo below. We lived with it like this for several years before deciding to make big changes!
The initial decision to make the change came when we noticed the tile countertop being pulled down by the weight of the original farmhouse sink. The grout was pulling away and you could see the unevenness in the tiles. I knew I had to save the sink and I always wanted quartz countertops and open shelving, so we decided to do it all!
The process took about three months, mainly because we did everything ourselves. We saved a lot of money by not hiring help. My boyfriend and grandfather are handy men and did all of the work.
The tile was more tedious than we thought, and because my boyfriend had to work on it after work hours and on weekends it took a little longer than planned. We spent around $3,000, with the main expense being the new bottom cabinets and quartz countertops.
The kitchen is not very big so I love how taking away the bulky old top cabinets has made it feel so open. My favorite part is the shelving; my grandfather made the shelves and they turned out so beautiful. I was excited about adding some brass touches; the brackets, faucet, and hardware are my obsession.
My inspiration for the kitchen was beautiful open shelving — we revolved everything around the shelves! I wanted it to be bright and eclectic like the rest of our 1920s bungalow home. I knew I wanted a light white/grey marble or quartz countertops and to do a fun patterned blacksplash to add interest.
I love how the black and white tile turned out. We added brass hardware; I liked the shape of the faucet for a modern touch. Vintage copper and thrift store finds are displayed throughout, along with hanging plants for the homey, boho feel we so love.
Shannon’s words of wisdom: If you are doing a DIY, be realistic about your timeline and setting a budget!
Getting the Best Contractor at a Price You Can Afford
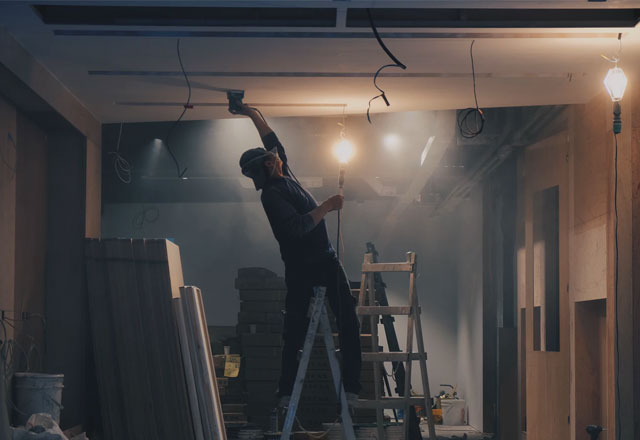
Putting together a budget for a home improvement project can be a daunting process in itself. Add in the task of finding, vetting, and hiring a contractor to complete the work, and it can seem all but impossible for anyone without contemporary construction management experience. But the reality is that the process doesn’t necessarily have to be so intimidating.
Finding and working with a contractor that fits within your budget, does quality work, and leaves you with the bathroom, kitchen, additional bedroom, or home of your dreams is possible. According to HGTV, it’s also a challenge and one that you really want to get right. Here’s how to go about doing it.
Word of Mouth and Referrals
One of the most important parts of finding the right contractor for your home improvement project involves relying on your personal network. Among your friends, coworkers, and family members, there are likely several people who have been right where you are now. When starting the process, reach out to your network(s) and ask for referrals first.
Ask the people you know about contractors they’ve worked with, how things worked out, and who they would work with again (if anyone). Ask them who they would refer their mother to if their mother needed to remodel her kitchen or bathroom. And don’t just stop when you hear the first glowing story. You’ll want a few contractors to choose from when the time comes.
Portfolio Evaluation and References
Once you’ve reached out to your network and amassed a list of potential contractors that your friends, family, or coworkers would do business with again, it’s time to do your research on them. Take a look at their online portfolios and get a feel for the kind of work they do best.
Once you’ve narrowed your list a bit by looking at their resume, ask your semifinalists for references. The glowing review that your uncle gave a contractor buddy may not hold up to scrutiny once you’re having a conversation with another of their former clients, but you’d never know. Use these references to narrow your list down to at least three contractors.
The Bidding Process and Contracts
Once you’ve narrowed your list of potential contractors down to three finalists whose work you admire and who have an impeccable track record, it’s time to solicit bids. Get your remodel plan, your wants and deal breakers, and wrap your head around your budget prior to calling your contractors in for a site visit.
Your contractors may (and most likely will) charge a nominal fee for the site visit and bid. Sometimes this fee is deducted from the cost of the job if you hire a particular contractor. Pay for the bids; it’s the only way to get a solid handle on how much you could or should be paying for the job. During the site visit, asks every question you can think to ask. You should prepare an extensive list of questions, including some of the ones below.
What times will you and your team be on the property?
Will you obtain any necessary permits for the work being done if need be?
Will the area of my home being worked on be cleaned upon the completion of the work?
How will my personal items be protected?
Making Sure You Get the Best Work for Your Budget
Once you’ve received the bids from your finalists, you will need to sit down and make an educated decision. The conventional wisdom (for what it’s worth) says to take the bid in the middle, throwing out the highest and lowest bids. This doesn’t always yield the best result. But, doing your homework in advance should leave you with a comfortable choice between the best of three or more great contractors for your home improvement project.
Scenic can you put patio tiles over gr outdoor decoration outdoor patio tiles over concrete. Considerable fireplace i plan to place ceramic tiles over how can i add tile to my home improvement stack exchange. Irresistible stone tile over brick fireplace did i make a mistake how to can you tile over brick. Absorbing can you paint kitchen paint kitchen tiles tile then silver detailsmagic brush can you paint kitchen paint kitchen tiles over tile turned. Pristine bathroom remodel how to lay tile along with bathroom tile over tile shower houses ing ideas blogule. Unusual can i lay tile over tile to know about painting bathroom tilehomeoofficee com can i lay tile over tile. Shapely tiles along with backsplash diy also push grout then circular motion install tile over laminate counter. Manly grey peel as wells as stick vinyl along with stick vinyl tile trafficmaster bodden bay x grey peel. Stunning laminate ing over tile as peel also stick how to install laminate ing over vinyl tile droptom.
Scenic can you put patio tiles over gr outdoor decoration outdoor patio tiles over concrete in can you tile over tile.
Considerable fireplace i plan to place ceramic tiles over how can i add tile to my home improvement stack exchange in can you tile over tile.
Irresistible stone tile over brick fireplace did i make a mistake how to can you tile over brick in can you tile over tile.
Absorbing can you paint kitchen paint kitchen tiles tile then silver detailsmagic brush can you paint kitchen paint kitchen tiles over tile turned in can you tile over tile.
Pristine bathroom remodel how to lay tile along with bathroom tile over tile shower houses ing ideas blogule in can you tile over tile.
Unusual can i lay tile over tile to know about painting bathroom tilehomeoofficee com can i lay tile over tile in can you tile over tile.
Shapely tiles along with backsplash diy also push grout then circular motion install tile over laminate counter in can you tile over tile.
Manly grey peel as wells as stick vinyl along with stick vinyl tile trafficmaster bodden bay x grey peel in can you tile over tile.
Stunning laminate ing over tile as peel also stick how to install laminate ing over vinyl tile droptom in can you tile over tile.
Tempting installing laminate wood ing as wells as rv along with wood laminate wood ing cost singapore installing laminate wood ing over vinyl tile can you install in can you tile over tile.
We made some progress these past few weeks on our kitchen decisions so I thought I would fill you in today! We still have a few undecided areas so feel free to chime in in the comments if you have thoughts or suggestions. So, let’s get to it!
The Range & Range Hood
I alluded to this in yesterday’s weekend recap, but we’re at a crossroads with our range. We met with our kitchen designer last Wednesday since we need to finalize a few things to get the ball rolling. One of those items is the discussion of appliances. We initially weren’t going to replace any of them. They’re about ten years old, but all seem to be in good working condition. I’ve always wanted an actual range and it was mentioned that if I ever plan to get one, it made no sense to have custom cabinet doors built that may be torn off if I do a range once our cooktop dies. If we did a range, that would eliminate the need for one of our double ovens, which means we could then move the microwave to that area. The microwave was still a major discussion point – pantry or pull-out drawer on the island. We’re already going to be losing a fair amount of cabinet space with the window, so losing drawers too didn’t seem to make the most sense.
Suddenly getting a range seemed like it may be a better alternative. We ran to Nebraska Furniture Mart and scoped out options. The ones we are considering are not cheap, so, we’re definitely back on the fence about it. Ultimately, that’s the route we want to go but we have to decide if we invest now or down the road (which would then also require us to pull cabinets and cut out some of the new countertops). This is a major decision we have to make in the next day or too since it does change fabrication of both the cabinets and the countertop.
The range hood that is being built is 36″ so we’d likely go with a 36″ range if we go that route. That would help break up the long row of base cabinets you see above.
Countertops
We made major progress in our countertop decisions over the past few weeks! If you recall, we were flipping back and forth on marble or quartz or granite. I was thinking I wanted marble, but Kurtis was really worried about the durability and staining/etching aspects. But I think we found a quartz that will look even more beautiful and be significantly more durable!
We narrowed it down to these three selections rather quickly: Frosty Carrina, Statuario Maximum, and Calacatta Nuvo.
It may be a bit hard to see in photos, but we loved how the Calacatta Nuvo had a bit whiter of a background with some gray and warm beiges swirled in. It was exactly what we were looking for! It also definitely helped that had a sample kitchen set up using the product, so we could see the veining in a much larger scale. How cool is this wine holder they added on this one?!
Side note: I didn’t even know Martin’s Countertops existed until our designer recommended swinging in. We’ve been to several other shops on the southern side of Omaha, but this one is up north for you locals. I love that not only do they have a nice show room with tons of samples, but they have tons of slabs you can look at out in their yard. We’re working with Tony Nogg and he is amazing. It was the first time Kurtis had met him, and as we were leaving he said “I really liked that guy!” So, just a little plug for him if you’re local. Especially since we’ve been struggling lately in so many construction/service areas to find dependable people that are timely and follow through when they say they will!
I’m most excited at Tony’s description of the beveled edge. Basically, the quart would come in the stand 3 cm thickness. But, they can fabric a 2″ lip on the perimeter, essentially making it look like the slabs are that much thicker. They showed us samples and we were blown away. Since they match the pattern up, you’d have no idea that this is part of the fabrication process, and not the actual thickness of the counters. So excited for this part!
This post contains affiliate links for your shopping convenience. Click here to read my full disclosure policy.
Sink Options
I’d love feedback on this one. We know we want to go to a single-bowl sink, but we keep going back and forth on whether or not we want a farmhouse style apron-front sink or just an undermount sink that’s one large bowl. We’d likely go cast iron either way so it will look white. Thoughts on this one? Good or bad experiences with either?
Barstool Options
I’ve continue to think it over, and I’ve ultimately decided to with . I think they navy blue will add a fun pop of color to an otherwise neutral space.
Pendant Lights
This is another area where I’m completed stuck. If you recall, I originally thought of doing to match our dining room chandelier. But I’m not actually sure that’s the look I want in the kitchen (especially since I’d love a lantern in our entryway eventually). I’m just worried it may look a bit matchy-matchy. Here are a few looks I’m considering, but still don’t think I’ve found “the one”.
Backsplash Options
We still have mixed thoughts on our backsplash. With the new setup – lowering the bar and adding a window on the area where the microwave currently sits, we’ll only need backsplash on the wall with the range. In other words, not very much at all! So, this allows us to get something that may otherwise be overbearing. We were originally leaning towards a white beveled subway tile (although Kurtis prefers the non-beveled variety) we’re now wondering if we should go with something with a bit of a pattern. I’m willing to go with something a little more trendy/less classic here, since it would be an easy and rather affordable update down the road if we wanted to change things up. I’m thinking something subtle though, like a grayish-blue and white cement tile or a handmade subway with a bit of color. We need to run to a few custom stores in town to get a better feel for what’s out there. But here are a few options that have the vibe we’re considering. I’ve included direct links under each one if you want more info.
Again, these are just very conceptual at this point until we have a chance to see what’s out there and see some samples in person.
Island Color
Another big decision we have yet to make is the island color. I was originally thinking I wanted navy blue, then I thought about just doing white. Now I’m actually leaning towards a mid-tone grayish blue. Since a portion of ours will have to be replaced, I’m thinking I’m going to just put some samples up on our current one to test them in the natural light. With the island being lowered in most areas, the thought of color doesn’t scare me quite as much. I would prefer it lean a bit more blue and Kurtis would prefer it be a bit more gray. So this one may end up being a last-minute decision!
I’m actually super frustrated with Pinterest lately. 90% of the pins I click on are basically click-bait so I can’t ever find the real information I’m looking for. I have found so many beautiful kitchen islands but can’t ever find the original source to get paint colors and it feels like I keep going in circles. I even try reverse Google images searches and since Pinterest basically out-ranks everything I only get links to every folder the image is on. #sorryfortherant So, I’ll just have to go with a little trial and error. Here’s a quick idea of one I was able to get the source on:
via @cottonwoodandco
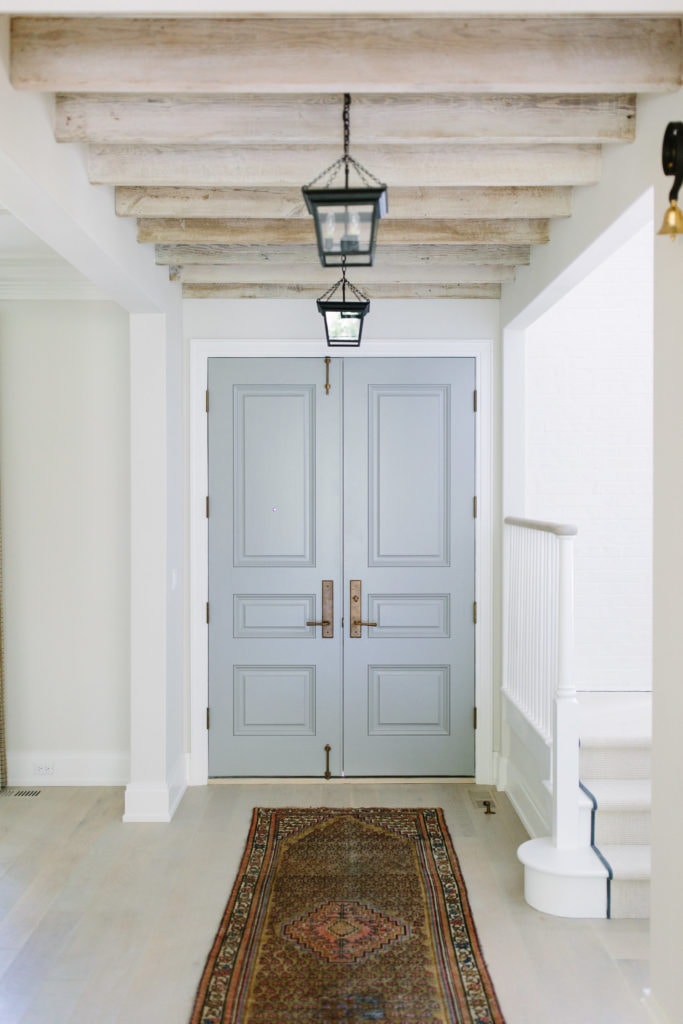
I’ve long been obsessed with these interior doors. The colors has been hotly debated, but the owner/designer insists it’s Benjamin Moore Cape May Cobblestone. If you look at the sample it’s closer to a muddy gray/taupe color but Kate says it turns blue in certain lights. So, it may be another one to consider!
via Kate Marker Interiors
We obviously still have a lot of other decisions to make like hardware, faucet, pot filler vs. no pot-filler, window style, etc. We’re just trying to get the base decisions made before moving on further. I’ll keep you posted in another week or two as we continue to make decisions!
If you would like to follow along on more of my home decor, DIY, lifestyle, travel and other posts, I’d love to have you follow me on any of the following:
The Kentucky Derby is on the horizon, and that signals the start of warmer months ahead for the vast majority of people residing in the United States. Growing up in Ohio, my mother would plant flowers every year on the first Saturday in May, making her annual trip to the nursery in the morning to buy her flowers, and spending the afternoon planting them around our loving home.
Home improvement stores hire additional staff to cover the increase they see in customer traffic to their stores this time of year. Many people get the “green thumb” or “handyman” itch with the warmer weather. The time has come to tackle the projects that could not be taken care of while winter bore down.
Perhaps your home shows signs of deterioration, and your ready to give it some tender loving care. It could be the interior needs some work, exterior, or both. It may be that your finances are such that you don’t have enough cash saved up to address whatever your home needs are currently.
Don’t stress. This article will cover some general home improvement ideas to get your creative juices flowing, and then offer a way that you can possibly finance the work your home needs.
The focus of this short article, as it relates to home improvement, will be on the exterior of the house. A great way to get ideas on how you envision the exterior of your home can be found by simply browsing through sites that offer .
Your home can range from a one-story ranch, farmhouse, to a condominium. Ideas can be found easily, as there exists millions of photos online of home design ideas.
The benefit to you is that most of these sites offer a “before and after” look at the home, giving you a more in-depth perspective. Many of these projects can be done on a budget, so don’t let the price tags associated with the work scare you off. Complements to the pricer products can be found at an affordable cost.
We lead busy lives. Money is tight as we tend to our family obligations. How about a project that can change the look and feel of an entire room? Better yet, there are many projects like this that can be done in an afternoon and for under $500!
These projects do not require years of experience as a contractor. With some basic tools and a little time, you can start, and finish, the project yourself and feel the sense of accomplishment for a job well done.
coating the walls with fresh paint, installing a ceiling fan, to reviving the deck, all on a budget and time friendly.
Some occurrences in life are inevitable. For home owners, it’s only a matter of time before the unexpected happens. The costly repair needs attention now. It could be a roof, plumbing, you can add to the list practically any set of homeowner circumstances. After all, no home is built to last forever.
It could be that you really want to renovate your home, but the needed money is not there. funds are available to assist you with your home improvement projects.
Perhaps you are not familiar with credit brokers. What they do is provide consumers with access to a variety of lenders. These lenders provide different loans under different requirements.
Hopefully, you are now armed with enough information to take a deep breath, relax, and plan your project accordingly. If you have found yourself stressing over a potential costly home repair, you now know that options exist to help cover these expenses.
 First, I added the hardboard and then I added the base to the bottom over the top of the hardboard.