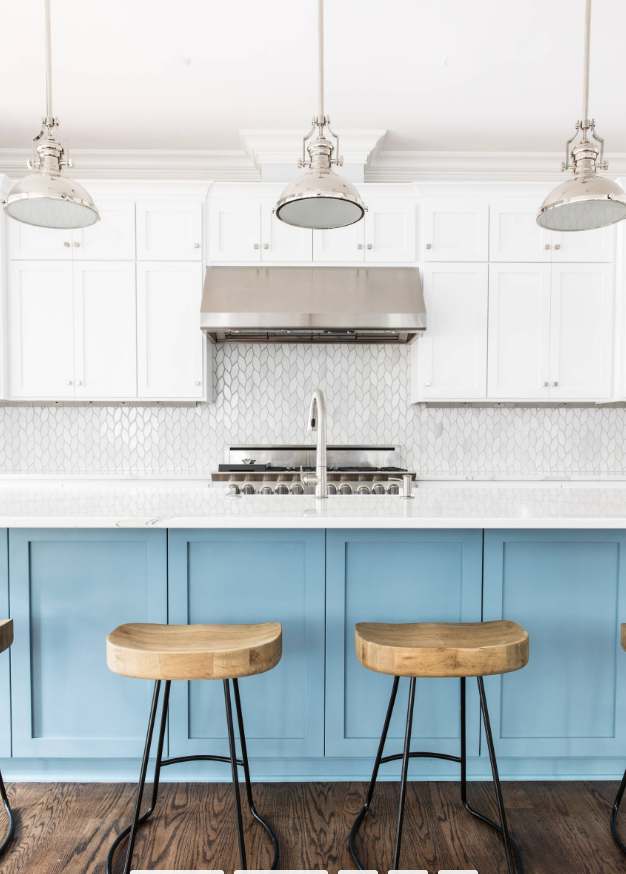
I’m back with another kitchen renovation progress update! If you’re new here, you can read about the start of our kitchen plans . As a reminder, I am working with and she has been amazing to work with. You can see some of our design selections so far in . Here is how our kitchen currently looks:
Let’s dive on it from where we picked up last!
This post contains affiliate links for your shopping convenience. Click here to read my full disclosure policy.
Here’s a rough sketch drew out with the cabinet layout before transferring it to an official rendering. You can see we’ll be doing an x-detail on the sides of the island and then solid x-doors in the small upper top cabinets.
Here are a few renderings of the updates we’ll be making to the space. There were a few software limitations with our designer’s software, so a few things are slightly different than they appear here. We ultimately decided to get new appliances, after hearing so much feedback from you guys on designing around our ten year old appliances. So, we will be adding a full 36″ duel fuel range (the design below shows a cooktop). One of the things we are most excited about is a counter-depth fridge. Ours currently sticks out by nearly a foot from the counter. Because we’ll be losing depth, the one we are getting is nearly a foot taller than our current one.
The taller fridge will require an update to our upper cabinets over the fridge. As we started talking with the cabinet door maker, he ultimately decided it would only be about $1,000 more for him to build all new cabinets and island from scratch than it would be to modify our existing cabinets.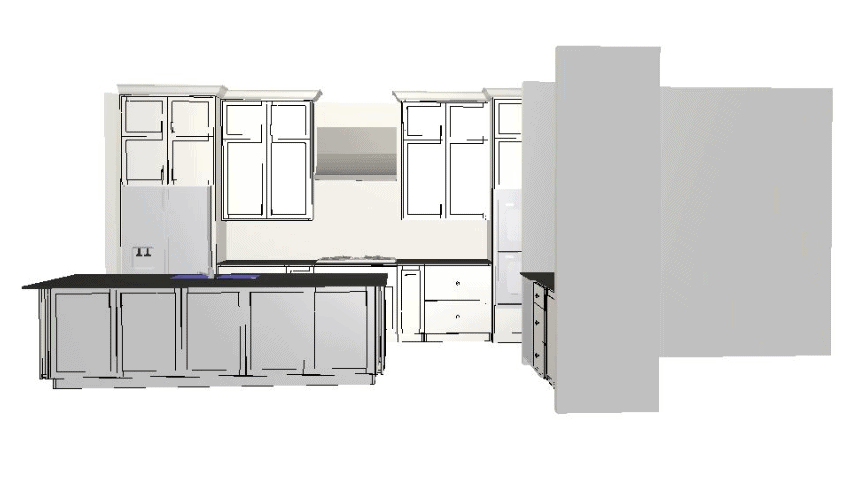
One minor issue we ran into, is that because we want a 2″ mitered edge on our countertops, one slab of quartz wasn’t going to be big enough for our currently island size (since we’ll be taking it all down to one level). So, although our island will be slightly less deep than our current one, we can actually make it longer to accommodate wider drawers and an extra cabinet. This will also help add a few extra inches between our bar stools and living room chairs (it’s so tight currently). Another thing to note: we’ll be going with a single basin sink – we just haven’t finalized “the one”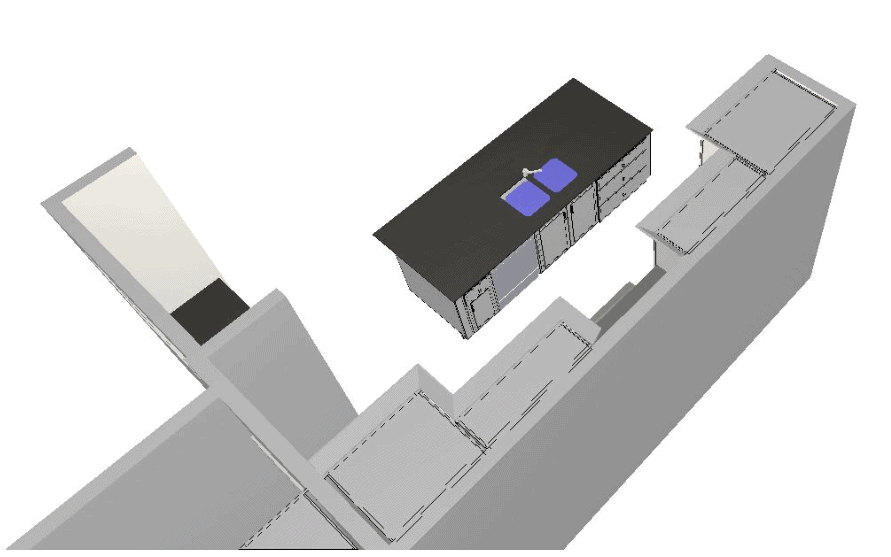
Because we’ll now be doing fully custom cabinets, we can maximize space as much as possible, even though we’ll actually be removing quite a bit of cabinets. We actually save over a foot on the side with the ovens because we’ll no longer have to have a stock trim kit, so we’ll free up a lot of space there. We’ll also be adding upper cabinets on either side of the range that aren’t currently there now. If you look at the current photo, you’ll notice the lowers are all doors in our current kitchen, which hasn’t been super functional over the years. So, now we’ll be adding in more drawers and faux drawer fronts (the two drawers next to the refrigerator will actually be our garbage bin and recycle bin and the entire unit will pull out).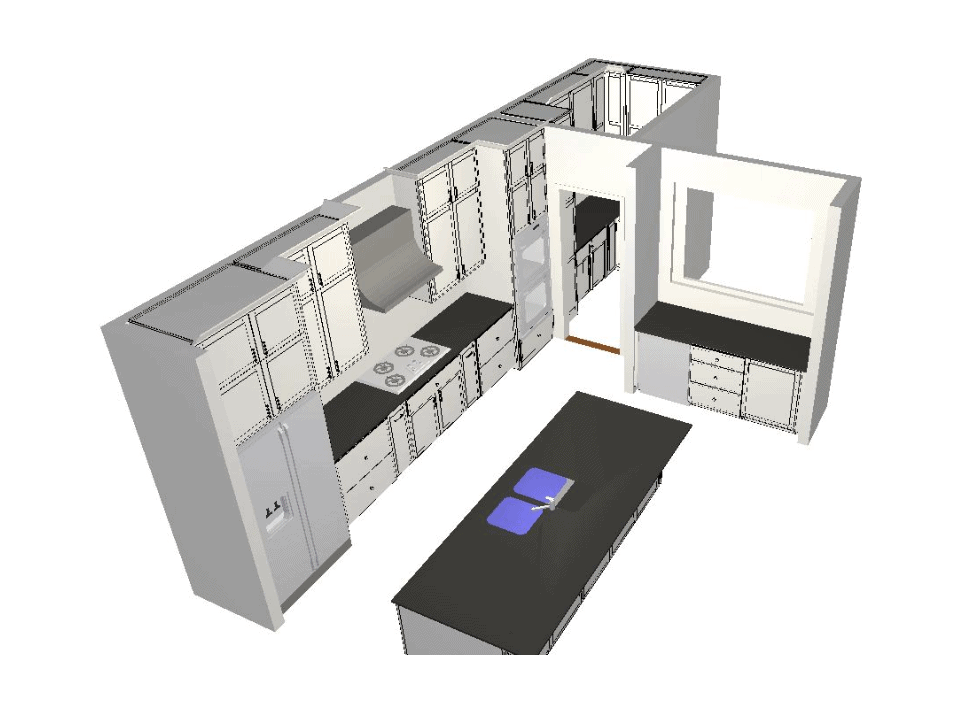
These next two renderings give you a better view of the pantry cabinets. We’ve ultimately decided our pantry will never be beautifully organized, so we’d rather hide everything. I was actually going to leave the upper portion open shelving, but Kurtis wants it all behind doors since he knows how organized we both are To the left, we’re having a tall storage cabinet that will store our cleaning supplies like the Swiffer, hardwood vacuum, etc. along with other cleaning supplies we store in the pantry. The countertop will serve as a prep area, particularly for Kurtis who likes to leave out the stuff he uses every day (magic bullet, waffle maker, oatmeal container, etc.). This way, he can leave it out but the kitchen will still look clean!
Here’s a view of the cabinets looking into the pantry from the door. We’ll also be adding a 3’x3′ window to the pantry (on the right side solid wall) to add some natural light and not make it feel so much like a closet. The drawing below also shows the layout for the cabinets under the window in the kitchen. We’ll also be adding a beverage refrigerator on the left of the drawers.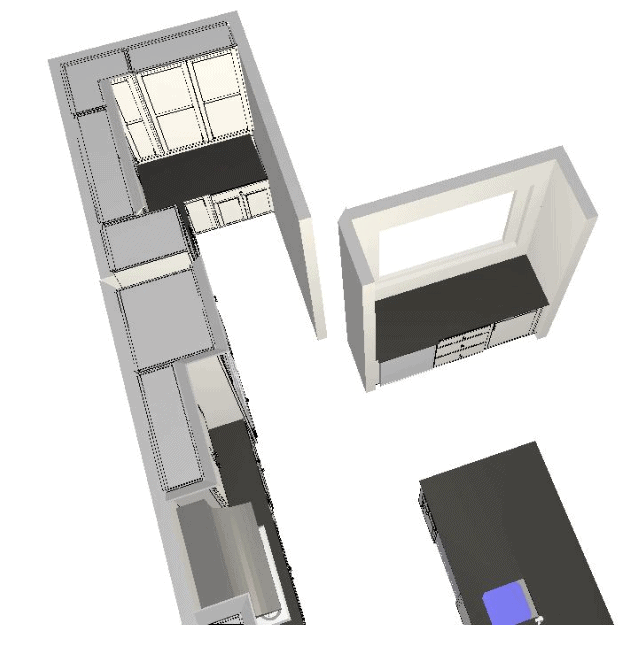
Today the cabinet maker is coming over to finalize a few things before getting started (hopefully within the next week)! It’s starting to get real!
Additional Island Color Inspiration
In my last , I expressed my frustration with actually finding the names of colors I like for the island. Pinterest is a never-ending loop of bad links at times and Google images just tends to throw me back into that look. But, I appreciate all the great suggestions you gave me and have since had better luck.
Since the island will be lowered to all one level and with the walls in surrounding areas and main cabinets being white, I feel like we can be a bit more adventurous on the island color. I keep flipping between wanting a bluish French gray color (having a harder time finding examples of this that aren’t too gray) and a muddy blue green color. It’s a decision I have to finalize in the next day or two, so pressure is on! Here are a few more island color inspiration photos I found and loved! You can click any of the images for more details on colors and design. I still haven’t found “the one” yet so it may be a last minute decision. Always a great thing
Other random inspiration & design elements
I like this cabinet color, but was also really drawn to the drawers around the range. Ours will be a full range, but the side drawers will be similar. We’re planning one drawer for spices and the other for utensils, much like how this photo is set up. You can see these sketched into Erica’s design plans above.
Kitchen Accessories
If you would like to follow along on more of my home decor, DIY, lifestyle, travel and other posts, I’d love to have you follow me on any of the following:
Pinterest / Instagram / Facebook / Twitter / Google+
disclosure: some affiliate links used
The post Kitchen Renovation Progress appeared first on Life On Virginia Street.
Source
https://lifeonvirginiastreet.com/2018/06/kitchen-renovation-progress/