Tiny Kitchen Remodel, the Reveal of our RV Kitchen!
Posted on October 3, 2016
in Design Inspiration, Home Decor, Home Tour, Interiors, Makers Gonna Make, RV Renovation, RV Tour, Wanderlust
True confession, I’ve been a bad blogger.
With that said, I’m also a super excited blogger because we are finally sharing the reveal of our RV kitchen renovation with you, yay!
For those that are new here you can read more and our , and don’t forget to check out . This post may contain affiliate links for your convenience. View our full disclosure .
You see, I’ve been struggling with keeping up with content and projects and emails, and orders, and well.. everything for so long that I’ve fallen crazy behind. You may already know this and if not, welcome to my reality, although I don’t think I’m alone in feeling this way.
In an ideal world we would have been posting our projects consistently and in some sort of organized fashion, but that hasn’t happened. I dropped the ball, many times… Woops.
Here’s the thing, before we left on our RV trip I felt like I was doggy paddling just to stay above water. And this went on for at least a year. Every time I thought I was going to get ahead some crazy wave would crash and there I was, paddling even harder.
We had a plan but as we all know, life doesn’t always go according to plan. Gotta keep it interesting, right?
However, moving from 1800 square feet into less than 300 has taught me a lot, and it’s only been two months. I’m learning to slow down, be more present, and most importantly not worry about how everyone else seems to have it all together when I’m over here feelin’ like a hot mess.
It’s funny that without a permanent address and A LOT less stuff I somehow feel more as ease, a lot less anxious, and a lot more fulfilled.
That’s not to say I don’t look forward to settling down in a year or so, but for now I’m going to erase the prior expectations I had set up for us, and focus on moving forward with a clean slate. It’s strange how taking off that type of pressure can be so liberating and energizing, isn’t it?
You’re probably wondering where I’m going with this…. Eric and I had this idea of how our RV renovation was going to go, and naturally that didn’t involve a massive water leak or generator issues, haha. We had also planned to share the projects we were working on along the way, to lead up to the final reveal of that specific space we had been working on. Well, that didn’t happen, so we’ve decided to say screw it and switch it up.
Today we’re going to share the current state of our RV kitchen renovation, and then link to the projects involved as they get posted later down the road.
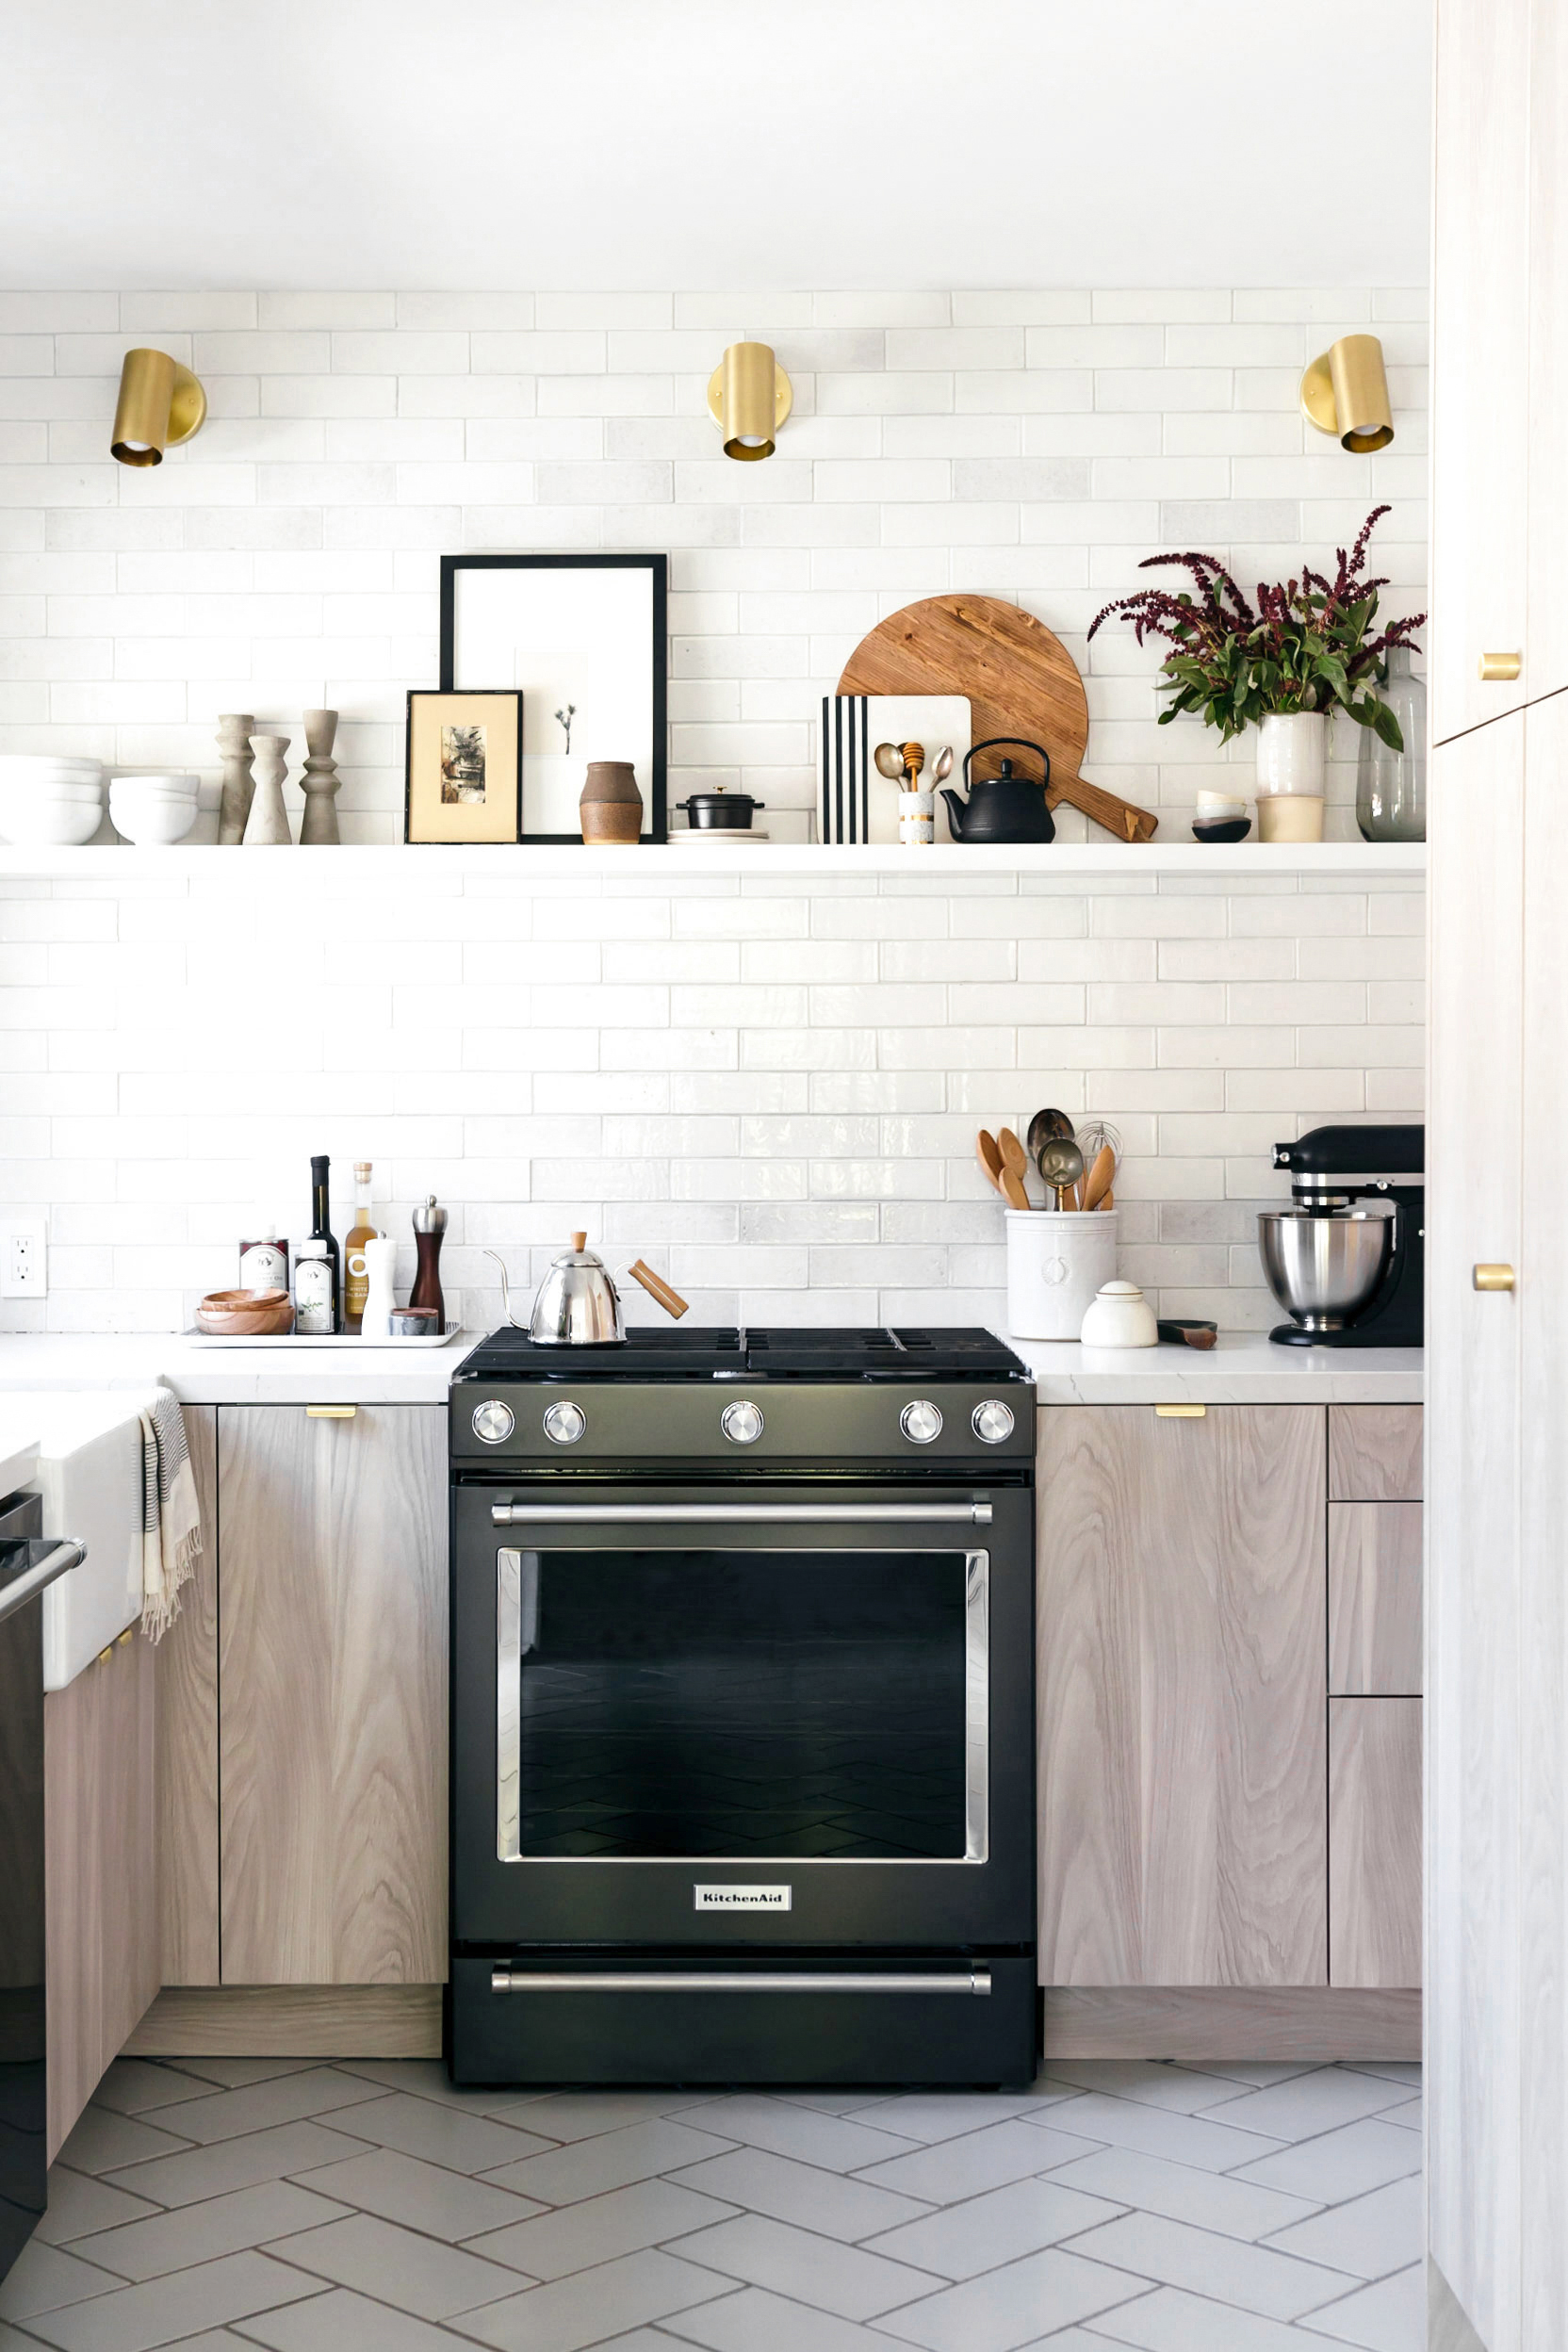
RV Kitchen Renovation
We’ve been enjoying our tiny kitchen for two months now, but we still have a few projects on our to-do list. However, if I wait to share it until everything is absolutely perfect, you may never see it. ?
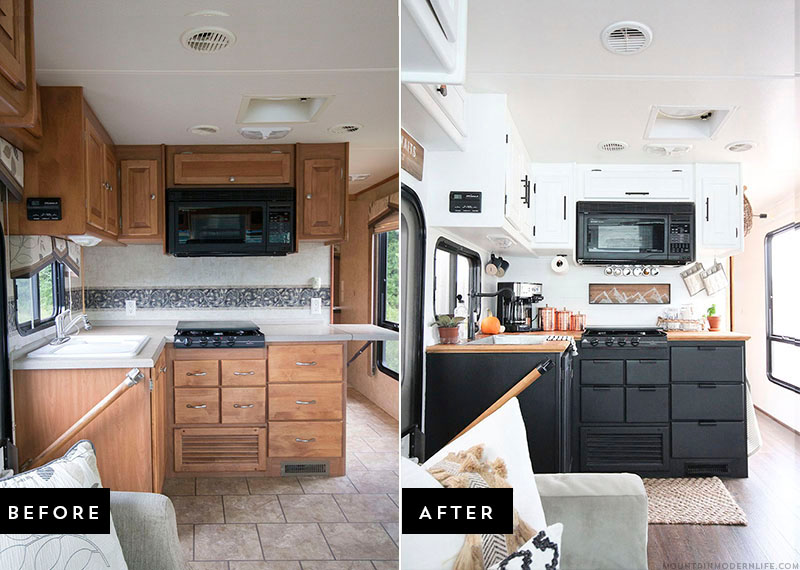
Here’s the before photo of our RV kitchen, just in case you need a refresher:
It wasn’t bad, it just wasn’t our style, and every single person that owns a 2008 Tiffin Open Road 32La has this exact kitchen. We needed a space that felt like ours, ya know?
The plan was a rustic modern kitchen design that would also brighten up the space.
So the first thing we did was remove the cabinet doors so we could get started on the painting process, which you can read all about here.
From the beginning I knew I wanted two-toned cabinets, but was torn between painting the lowers black or gray. To be honest, I really wanted black but everyone kept telling me I was crazy to put black cabinets in such a small space. In most circumstances I would have done it anyway but for some reason I was more nervous this time around with this being our first real renovation project.
So we painted the upper kitchen cabinets white and the lower cabinets in a medium gray. Two weeks later we discovered a massive water leak in the ceiling due to cracks in our skylight. The upper cabinets had to come out so we could replace the ceiling panel, and that’s when I made the decision to paint the lower cabinets black.
And I’m sooooooo glad I did!
Moral of the story? Don’t be afraid to paint the cabinets (or anything for that matter) the color you feel is right in your gut. You’re the one that’s gotta live in the space anyway, so do what’s going to make you happy.
Besides, paint can always be re-painted. It may not always be the most fun task, but it isn’t permanent.
Here are a few more photos of our RV kitchen renovation:
If you follow us on Instagram you may have seen the mountain art I created on leftover reclaimed wood – the same kind we used for our rustic bathroom storage shelf.
We are hook obsessed over here. Seriously, mug hooks have come in super handy and I find myself wanting to use them for everything.
The backsplash was created from tongue and groove wood planks and the countertops were made out of oak wood flooring.
I really wanted a single basin sink but finding one in the dimensions we needed (that wasn’t over budget) turned out to be a much bigger task than I anticipated. Luckily I scored a stainless steel sink for just $20 on Ebay.
It may not be the biggest kitchen, but Eric and I spend a lot of time in here (mainly because the living room/office and kitchen are essentially one space), and we love it!
I’ll list the projects and sources below, but we’ll be sure to update the links as we add the projects to the blog. You can see a video with a bit more info on our kitchen counters below, which we shared on our Youtube channel a few months ago:
Using Wood Flooring for our Kitchen Counters:
Kitchen Renovation Tips:
I recently shared some kitchen reno tips over on Wayfair, along with some other bloggers, which you can check out here.
Kitchen Renovation Projects:
- Kitchen Extension Flip-up Counter – this is already installed but we haven’t posted about it yet.
- Re-Stained Stair Railing
- Installed New Cabinet Hardware
- Replaced Kitchen Sink
- Replaced Kitchen Faucet
Product/Decor Sources:
- Faucet – Amazon – Not sure if we recommend the one we purchased
- Sink – Ebay
- Wire/Rope Basket – HomeGoods
You can find the most recent photos of our kitchen in this Rustic Modern RV tour!
Are you planning to renovate the kitchen in your RV or have you already updated it? If so we would love to hear about it in the comments below!
Looking for RV or travel inspiration? You can find all of our RV-related and don’t forget to check out , Decor Resources, and !
Source
https://mountainmodernlife.com/rv-kitchen-renovation/